The Honeywell TH8321WF1001 is a Wi-Fi-enabled programmable thermostat from the VisionPRO 8000 series‚ offering advanced features for efficient climate control and smart home integration.
1.1 Overview of the Honeywell TH8321WF1001 Model
The Honeywell TH8321WF1001 is a Wi-Fi-enabled programmable thermostat from the VisionPRO 8000 series‚ designed for efficient climate control. It features a touchscreen interface‚ smart home integration‚ and compatibility with various HVAC systems. The thermostat supports advanced functions like dehumidification control and remote monitoring via the Honeywell Home app. Its installation involves mounting a wallplate and connecting wires‚ ensuring compatibility with existing systems. This model is known for its energy efficiency and user-friendly design‚ making it a popular choice for modern homes seeking precise temperature management and smart connectivity.
1.2 Key Features of the Wi-Fi VisionPRO 8000 Series
The Wi-Fi VisionPRO 8000 series‚ including the TH8321WF1001‚ offers a touchscreen interface‚ remote access via the Honeywell Home app‚ and voice control compatibility with smart speakers. It features advanced humidity control‚ fan operation settings‚ and energy-saving modes. The thermostat supports IAQ relay setup for indoor air quality and optional outdoor sensor integration. Its smart home automation capabilities allow seamless integration with other devices‚ while the large display ensures easy navigation. These features make it a versatile and efficient solution for modern heating and cooling systems.
1.3 Importance of the Installation Manual
The installation manual for the Honeywell TH8321WF1001 is essential for ensuring proper setup and functionality. It provides step-by-step instructions‚ safety precautions‚ and troubleshooting tips. The manual helps verify system compatibility and guides the configuration of advanced features like Wi-Fi connectivity and smart home integration. Following the manual ensures compliance with safety standards and warranties. It also serves as a reference for understanding installer options and user settings. Proper installation‚ as outlined in the manual‚ guarantees optimal performance‚ energy efficiency‚ and long-term reliability of the thermostat.

Pre-Installation Requirements
Ensure HVAC system compatibility‚ gather necessary tools‚ and observe safety precautions before starting the installation. Verify power requirements and prepare for Wi-Fi setup and configuration.
2.1 Compatibility Check for HVAC Systems
The Honeywell TH8321WF1001 is compatible with most HVAC systems‚ including 1H/1C heat pumps‚ 2H/1C heat pumps with auxiliary heat‚ and gas furnaces. It also supports dual fuel systems and 24VAC systems. Ensure your HVAC system matches the thermostat’s compatibility requirements before installation to avoid operational issues. Refer to the manual for specific wiring and system configurations‚ such as IAQ relay setups or outdoor sensor connections‚ to ensure proper functionality. Verify system type and voltage to match the thermostat’s specifications for safe and efficient operation.
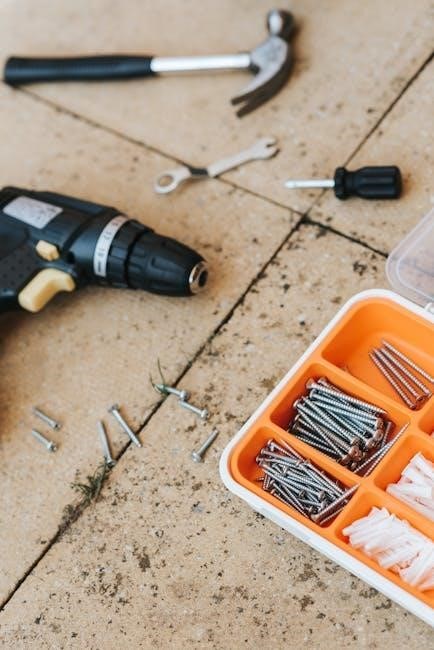
2.2 Tools and Materials Needed for Installation
To install the Honeywell TH8321WF1001 thermostat‚ you will need a Phillips screwdriver‚ a drill (for wall anchors if required)‚ and pliers for wire handling. Additionally‚ ensure you have wire strippers for trimming wires and a voltage tester to verify power is off. A level is recommended to ensure proper alignment‚ and a ladder may be necessary for reaching the installation area. Refer to the installation manual for specific tools and materials tailored to your HVAC system configuration‚ such as IAQ relay setups or outdoor sensor connections.
2.3 Safety Precautions Before Starting
Before installing the Honeywell TH8321WF1001‚ ensure the HVAC system’s power is turned off at the circuit breaker or fuse box. Verify this with a voltage tester to avoid electrical shock. Close the furnace door securely if applicable. If the thermostat is battery-powered‚ install fresh AA batteries. Wear protective gloves and safety goggles. Ensure the work area is clear and well-lit. Follow all local electrical codes and manufacturer guidelines to prevent accidents or system damage during installation. Always refer to the installation manual for specific safety instructions.
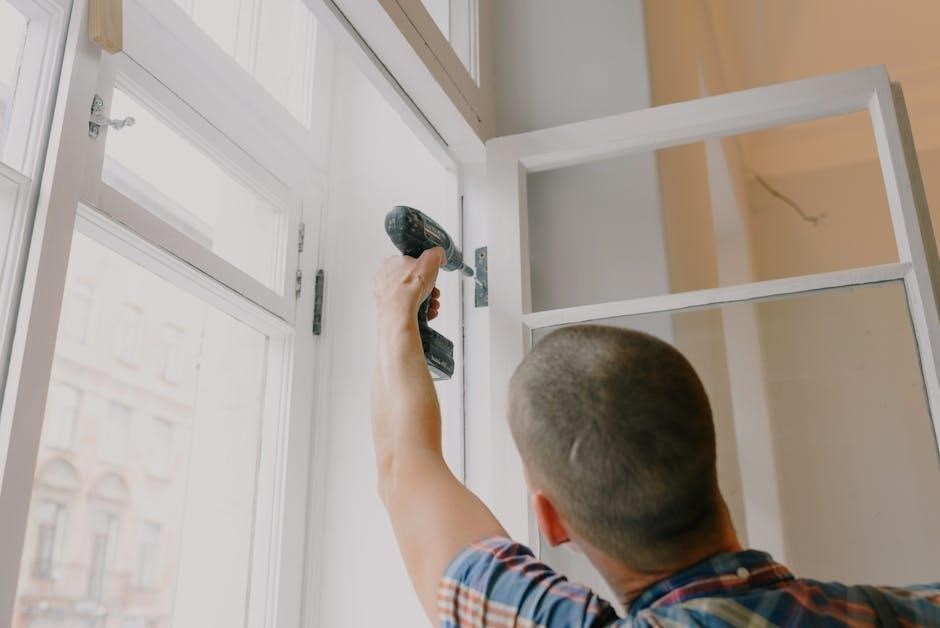
Physical Installation of the Thermostat
Separate the wallplate from the thermostat and mount it securely. Attach the thermostat to the wallplate‚ ensuring proper alignment and a secure fit for reliable operation.
3.1 Removing the Old Thermostat
To remove the old thermostat‚ first ensure the HVAC system is turned off at the circuit breaker. Press the button on the top of the thermostat and gently pull the wallplate away from the unit. Carefully label and disconnect the wires from the old thermostat‚ taking note of their positions. Once the wires are free‚ remove the old thermostat from the wallplate. Store the wires securely to avoid damage. This step ensures a smooth transition for installing the new Honeywell TH8321WF1001 thermostat.
3.2 Mounting the Wallplate
Mount the wallplate by peeling the backing from the adhesive and pressing it firmly onto the wall‚ ensuring it is level. If additional stability is needed‚ use the provided screws. Align the wallplate with the wiring hole to ensure proper fitment. Gently press the wallplate until it adheres securely to the wall. Make sure it is straight and properly seated. No additional tools are required for this step‚ as the wallplate is designed for easy installation. This step ensures a solid base for attaching the thermostat later.
3.3 Connecting the Wires to the Thermostat
Connect the wires to the corresponding terminals on the thermostat‚ ensuring each wire is securely attached and matches the correct terminal (e.g.‚ R‚ W‚ Y‚ G‚ C). Refer to the wiring diagram in the manual for proper connections. Turn off the power at the circuit breaker before starting. Double-check all connections for accuracy and tightness to prevent malfunctions. Proper wiring ensures the thermostat functions correctly and integrates with your HVAC system effectively. Once connected‚ proceed to attach the thermostat to the wallplate.
3.4 Attaching the Thermostat to the Wallplate
Align the thermostat with the wallplate‚ ensuring it fits securely into place. Gently press the thermostat onto the wallplate until it clicks or snaps into position. Verify proper alignment and ensure the thermostat is evenly mounted. Check for any gaps or loose connections. Tighten any screws if necessary to secure the thermostat firmly. Once attached‚ restore power to the HVAC system and test the thermostat’s functionality to ensure it operates correctly. Proper attachment ensures reliable performance and prevents potential issues.
Configuring the Thermostat
Align the thermostat with the wallplate‚ ensuring proper fit. Gently press until it clicks or snaps into place. Verify alignment and secure mounting. Check for gaps or loose connections. Tighten screws if necessary. Ensure the thermostat is even and firm. Restore power and test functionality. Proper attachment is crucial for reliable operation and preventing issues. Ensure all buttons and screens respond correctly after installation. This step finalizes the physical installation‚ readying the thermostat for configuration and use.
4.1 Setting Up Installer Options
Access the Installer Options by touching Menu on the thermostat‚ then selecting Installer Options. Enter the password‚ which is the Date Code found under Dealer Information. Configure system settings like heating/cooling type and fan options. Save each setting to ensure proper configuration. This step is essential for optimizing the thermostat’s performance with your HVAC system. Refer to the manual or Honeywell’s resources for specific setup guidance. Proper configuration ensures efficient operation and integrates seamlessly with your home’s climate control system.
4.2 Configuring Wi-Fi Network Connection
To connect the Honeywell TH8321WF1001 to your Wi-Fi network‚ access the menu and select Wi-Fi Setup. Choose your network from the list and enter the password using the touchscreen. Ensure your router is nearby for a stable connection. Once connected‚ the thermostat will confirm network status. For remote access‚ link the thermostat to the Honeywell Home app. If issues arise‚ restart your router or reset the thermostat by removing and reinserting the batteries. A successful connection enables smart features like remote monitoring and voice control through compatible devices.
4.3 Setting the Date and Time
Navigate to the menu and select Date and Time to configure these settings. Use the touchscreen to set the current date‚ time‚ and time zone. Accurate time settings are crucial for scheduling and automated operations; The thermostat can sync with the Honeywell Home app for automatic updates‚ ensuring consistency. After setting‚ save your preferences to maintain the correct timekeeping. Note that the time zone must be set manually during initial configuration and cannot be automatically detected by the thermostat. This ensures precise temperature control and scheduling functionality.
4.4 Configuring Heating and Cooling Settings
Configure heating and cooling settings by accessing the thermostat’s menu. Set temperature ranges for heating and cooling modes‚ ensuring they align with your comfort preferences. Program schedules to automate temperature adjustments based on daily routines. Select the appropriate system type‚ such as heat pump or forced air‚ to optimize performance. For heat pumps‚ configure auxiliary heat settings if necessary. Ensure the date and time are accurately set‚ as these are crucial for schedule-based operations. Adjusting these settings properly optimizes energy efficiency and maintains consistent indoor comfort.
Advanced Features of the Honeywell TH8321WF1001
The Honeywell TH8321WF1001 offers advanced features like dehumidification control‚ IAQ relay setup‚ outdoor sensor configuration‚ and fan control options‚ enhancing efficiency and home comfort significantly.
5.1 Dehumidification Control
The Honeywell TH8321WF1001 features advanced dehumidification control‚ automatically monitoring indoor humidity levels and activating the cooling system to reduce moisture. This function helps maintain a comfortable environment by preventing excessive humidity‚ which can lead to mold growth. The thermostat also supports IAQ (Indoor Air Quality) relay setups‚ allowing integration with ventilation systems to enhance air quality. By managing humidity effectively‚ this feature contributes to a healthier and more energy-efficient home climate‚ ensuring optimal performance during cooling cycles.
5.2 IAQ Relay Setup for Indoor Air Quality
The Honeywell TH8321WF1001 supports IAQ (Indoor Air Quality) relay setups‚ enabling integration with ventilation systems to enhance air quality. The IAQ relay can be wired to the low-speed fan‚ allowing the thermostat to control ventilation based on humidity levels or system requirements. This feature works in tandem with dehumidification control to improve indoor air quality by reducing moisture and ensuring proper ventilation. The IAQ relay setup is customizable‚ offering flexibility to adapt to different home environments and system configurations‚ thus promoting a healthier and more comfortable living space.
5.3 Outdoor/Remote Sensor Configuration
The Honeywell TH8321WF1001 allows for the integration of an outdoor or remote sensor‚ enabling precise temperature monitoring and system control. The sensor can be configured to measure external temperatures or discharge air‚ enhancing the thermostat’s ability to regulate heating and cooling. Configuration is done through the Installer Options menu‚ where you select the sensor type and set thresholds for stage operation. This feature ensures optimal system performance‚ improving temperature regulation and energy efficiency while maintaining comfort levels throughout the home.
5.4 Fan Control Options
The Honeywell TH8321WF1001 offers advanced fan control options‚ allowing users to customize airflow settings for optimal comfort. Through the Installer Options menu‚ you can configure the fan to run continuously or in auto mode‚ ensuring consistent air circulation. Additionally‚ the thermostat supports fan speed adjustments and timed operation‚ enhancing energy efficiency and system performance. These settings can be easily accessed and modified via the Honeywell Home app‚ providing remote control and flexibility to tailor fan operation to specific needs or preferences for a balanced indoor environment.
Wi-Fi and Smart Home Integration
The Honeywell TH8321WF1001 integrates seamlessly with smart home systems‚ enabling voice control through Amazon Alexa or Google Home and remote monitoring via the Honeywell Home app.
6.1 Connecting to the Honeywell Home App
Download and install the Honeywell Home app from the app store. Ensure your thermostat is connected to your home’s Wi-Fi network. Open the app‚ create an account or log in. Navigate to the ‘Add Device’ section and select your thermostat model. Follow the in-app instructions to pair the thermostat with your account. Enter your Wi-Fi network password when prompted. Once connected‚ you can control and monitor your thermostat remotely‚ adjust settings‚ and receive notifications. Ensure your router is functioning correctly and the thermostat has the latest firmware for optimal performance. If issues arise‚ refer to the manual or contact Honeywell support.
6.2 Voice Control with Smart Speakers
Enable voice control by linking your Honeywell Home app with Amazon Alexa or Google Home. Open the smart speaker app‚ search for Honeywell Home skill‚ and link your account. Use voice commands like “Set living room to 72°F” or “Turn off the AC.” Ensure your thermostat is connected to Wi-Fi and updated with the latest firmware. This integration allows seamless control without needing to use the thermostat or app‚ enhancing convenience and smart home automation. Refer to the app or manual for specific command options and troubleshooting tips.
6.3 Remote Monitoring and Adjustments
Using the Honeywell Home app‚ you can remotely monitor and adjust your TH8321WF1001 thermostat settings from anywhere with an internet connection. Check current temperature‚ humidity levels‚ and system status. Adjust heating or cooling settings‚ override schedules‚ or switch modes (Heat/Cool/Off). Enable notifications for temperature changes or system alerts. Remote access ensures convenience and energy efficiency‚ allowing you to make adjustments before arriving home. Ensure your thermostat is connected to Wi-Fi and properly configured in the app for seamless remote control and monitoring capabilities.
6;4 Smart Home Automation Features
The Honeywell TH8321WF1001 integrates seamlessly with smart home systems‚ offering advanced automation capabilities. Compatible with Amazon Alexa and Google Assistant‚ it allows voice control for temperature adjustments. Use the Honeywell Home app to schedule settings‚ enable geofencing‚ or receive energy usage reports. It also supports integration with other smart devices‚ creating a unified home automation system. Customizable scenes and routines enhance comfort and efficiency‚ ensuring your home adapts to your lifestyle effortlessly. This thermostat is designed to work with popular smart home platforms‚ making it a versatile choice for modern homes.

Troubleshooting Common Issues
The Honeywell TH8321WF1001 manual provides guidance for diagnosing and resolving common issues‚ such as connectivity problems‚ display malfunctions‚ or system operation errors‚ ensuring smooth HVAC performance.
7.1 Resolving Wi-Fi Connection Problems
To resolve Wi-Fi issues with the Honeywell TH8321WF1001‚ restart the router and thermostat. Ensure the thermostat is connected to the correct network using the right password. If issues persist‚ check for firmware updates or reset the device. Access Installer Options using the Date Code as the password to reconfigure Wi-Fi settings. Verify network strength and ensure no physical obstructions are affecting the signal. Consult the manual for detailed troubleshooting steps to restore connectivity and ensure proper smart home integration.
7.2 Addressing Display or Touchscreen Issues
If the display or touchscreen is unresponsive‚ restart the thermostat by disconnecting and reconnecting the power. Ensure the screen is clean and free of debris. If the issue persists‚ check for firmware updates and install the latest version. Calibration issues can be resolved by accessing the Installer Options and adjusting settings as needed. Refer to the manual for detailed calibration steps. If problems remain‚ consult the troubleshooting guide or contact Honeywell support for further assistance. Always follow the manufacturer’s guidelines for repair and maintenance to avoid damage.
7.3 Fixing Heating or Cooling System Malfunctions
If your heating or cooling system fails to respond‚ verify thermostat settings and ensure proper Wi-Fi connection. Check circuit breakers and furnace/AC switches. Review wiring connections for accuracy and ensure no loose wires. If issues persist‚ access the Installer Options to reset system configurations. Perform a system test by enabling the fan or heat/cool modes manually. Consult the manual for system compatibility and troubleshooting steps. Contact Honeywell support or a professional for unresolved malfunctions to ensure proper functionality and safety.
7.4 Solving Password or Lockout Issues
If you encounter password or lockout issues with your Honeywell TH8321WF1001‚ reset the thermostat by removing it from the wallplate for 30 seconds. Reattach it and navigate to Menu > Installer Options. Use the date code found in Dealer Information as the default password. If the password is forgotten‚ perform a factory reset or consult the installation manual. Ensure all settings are reconfigured after a reset. For persistent issues‚ contact Honeywell support for assistance. Always keep your password secure and accessible for future adjustments.

Maintenance and Upkeep
Regularly clean the thermostat screen and ensure proper battery replacement. Update firmware and check for software updates to maintain optimal performance and extend the product’s lifespan.
8.1 Cleaning the Thermostat
To maintain optimal performance‚ regularly clean the Honeywell TH8321WF1001 thermostat. Power down the device before cleaning to avoid damage. Use a soft‚ dry cloth to wipe the touchscreen and exterior surfaces. Avoid harsh chemicals or abrasive materials that could scratch the screen. For stubborn marks‚ slightly dampen the cloth with water‚ but ensure it is not soaking wet. Regular cleaning prevents dust buildup and ensures accurate temperature readings and smooth touchscreen functionality. This simple maintenance step helps extend the lifespan of your thermostat and keeps it functioning efficiently.
8.2 Replacing Batteries (if applicable)
Although the Honeywell TH8321WF1001 is typically hardwired‚ some models may include backup battery power. If applicable‚ replace batteries with fresh AA alkaline batteries. Ensure the power to the HVAC system is turned off at the breaker or circuit panel before replacing. Remove the old batteries from the compartment‚ insert the new ones following the polarity markings‚ and close the compartment securely. After replacement‚ restore power and verify the thermostat functions correctly. Replace batteries annually or when the display indicates low battery levels to maintain uninterrupted operation. Dispose of old batteries responsibly.
8.3 Updating Firmware
Regular firmware updates ensure optimal performance and unlock new features for your Honeywell TH8321WF1001 thermostat. To update‚ open the Honeywell Home app‚ navigate to the thermostat’s settings‚ and check for available updates. Ensure the device is connected to a stable Wi-Fi network. Once an update is detected‚ follow on-screen instructions to download and install it. Avoid interrupting the update process. After completion‚ the thermostat will restart automatically. Verify the firmware version in the settings to confirm the update was successful. Keeping the firmware current is essential for maintaining functionality and security.
8.4 Checking for Software Updates
Regularly checking for software updates ensures your Honeywell TH8321WF1001 thermostat operates with the latest features and improvements. To check for updates‚ open the Honeywell Home app‚ select the thermostat from the dashboard‚ and navigate to the settings menu. Look for an option labeled “Software Update” or “Check for Updates.” If an update is available‚ follow the on-screen prompts to download and install it. Ensure the thermostat remains connected to a stable Wi-Fi network during the process. Updates typically complete quickly and may require a brief restart of the device.

Compliance and Warranty Information
The Honeywell TH8321WF1001 is RoHS compliant‚ ensuring environmental safety. It includes a comprehensive warranty covering parts and labor. Refer to the manual for detailed warranty terms and conditions.
9.1 RoHS Compliance Details
The Honeywell TH8321WF1001 thermostat is RoHS compliant‚ meaning it meets strict environmental standards by being free of hazardous substances like lead‚ mercury‚ and cadmium. This ensures safer use and disposal‚ aligning with global sustainability efforts. The product’s design and manufacturing process adhere to these regulations‚ making it an environmentally responsible choice. Additionally‚ the thermostat does not contain mercury‚ addressing concerns about toxic waste. Proper recycling of older‚ mercury-containing thermostats is encouraged to maintain environmental safety and compliance with local regulations.
9.2 Warranty Terms and Conditions
The Honeywell TH8321WF1001 thermostat is backed by a limited warranty covering manufacturing defects for a specified period. Registration on Honeywell’s website may be required for warranty activation. The warranty typically covers repairs or replacements for defects in materials and workmanship under normal use. Proper installation by a licensed professional is often a condition for warranty validity. Misuse or unauthorized modifications may void the warranty. For detailed terms‚ refer to the official Honeywell website or contact customer support. Warranty claims must be submitted within the specified timeframe and include proof of purchase.
9.3 Mercury Recycling Notice
The Honeywell TH8321WF1001 thermostat does not contain mercury; however‚ it may replace older devices that do. Proper recycling of mercury-containing products is essential to protect the environment. Honeywell encourages responsible disposal through certified recycling programs. Users are advised to check local regulations for guidelines on handling and recycling mercury-containing thermostats. For more information‚ visit Honeywell’s official website or consult local environmental agencies to ensure compliance with recycling standards and regulations.
9.4 Environmental and Safety Certifications
The Honeywell TH8321WF1001 thermostat adheres to various environmental and safety standards‚ ensuring eco-friendly and safe operation. It is RoHS compliant‚ meaning it contains no hazardous substances like lead or mercury. This certification underscores Honeywell’s commitment to environmentally responsible product design. Additionally‚ the thermostat meets rigorous safety standards‚ providing reliable performance and user protection. These certifications ensure the product aligns with global environmental and safety regulations‚ making it a trusted choice for homeowners seeking energy-efficient and secure solutions for their heating and cooling systems.
The Honeywell TH8321WF1001 installation process ensures efficient and precise temperature control‚ enhancing home comfort and energy savings through advanced features and seamless smart home integration.
10.1 Final Checklist for Successful Installation
Ensure all wires are securely connected to the correct terminals on the thermostat and wallplate. Verify the HVAC system operates correctly after installation. Check that the Wi-Fi network connection is established and functioning properly. Confirm the thermostat is unlocked using the Date Code password for installer settings. Review the installation manual to ensure no steps were missed. Test all features‚ including heating‚ cooling‚ and fan controls. Verify the outdoor sensor (if used) is properly configured. Ensure the thermostat is mounted level and securely attached to the wall. Finally‚ review the user manual for troubleshooting and maintenance tips to ensure optimal performance.
10.2 Benefits of Proper Installation
Proper installation of the Honeywell TH8321WF1001 ensures optimal performance‚ energy efficiency‚ and reliability. It guarantees seamless integration with your HVAC system and smart home devices. Correct installation prevents common issues like connectivity problems or system malfunctions. By following the manual‚ you ensure all advanced features‚ such as dehumidification and IAQ control‚ function as intended. Proper setup also enhances the thermostat’s ability to learn and adapt to your preferences‚ improving comfort and energy savings. Additionally‚ it ensures compliance with safety and manufacturer guidelines‚ maintaining warranty validity and reducing the need for frequent adjustments or repairs.
10.3 Resources for Further Assistance
For additional support‚ refer to the official Honeywell website‚ which offers comprehensive resources‚ including the TH8321WF1001 user manual and installation guide. The Honeywell Home app provides step-by-step setup instructions and troubleshooting tips. You can also access the Honeywell customer support hotline at 1-855-733-5465 for personalized assistance. Furthermore‚ online forums and tutorials offer community-driven solutions and expert advice‚ ensuring you can resolve any issues and maximize your thermostat’s functionality; These resources are designed to help you achieve a smooth and efficient installation experience.